"That's what we're gonna call it. I got worms! We're gonna specialize in selling worm farms. You know, like ant farms."
Little did I know that Lloyd (from the movie "Dumb and Dumber") was actually onto something. Worm farms. Huh.
The day we moved into our new home was a cold, miserable day. Our good friends Maribeth and Eric were kind enough to help us move our belonging on that drizzly March day. After everything had been unloaded, they presented us with our first housewarming gift. It was a gift like no other!
Our dear friends, who know us so well, gifted us with a huge bin full of worms and rotten produce. I was so excited I could hardly stand it! Seriously. A worm farm!!! Best housewarming gift EVER (but I would recommend that you know your audience before you present this a gift. Ha!). I had done a wee bit of research on "vermicomposting" (the fancy name for worm farming/composting), but didn't have the time or resources to follow through.
If you already compost your kitchen scraps and are interested in producing wonderful *free* fertilizer for your house plants and garden, then perhaps vermicomposting is for you! Anyone can vermicompost. Doesn't matter if you live in a tiny apartment or have acres to roam. You can be as serious about it or relaxed as you want to be (I know from personal experience that you can completely neglect your worms for over 6 months... and they will still be [mostly] fine. Sorry little buddies.). Vermicomposting is especially fun to try with kids - they delight in seeing those wiggling worms. Last week, at the library, we actually stumbled across this book in the children's section, called "Winnie Finn, Worm Farmer" by Carol Brendler. What a fun book to introduce children to the concepts of worm farming! I may or may not have enjoyed the book more than my kids :)

A fun book about vermicomposting to read with the kids!
"Winnie Finn, Worm Farmer" by Carol Brendler
Here is the quick lowdown on vermicomposting:1. You create a container to hold the worms.
2. You feed the worms a combination of kitchen scraps, newspaper, yard waste, etc.
3. The worms will digest the scraps and create two by-products: Worm Tea (liquid fertilizer) and Worm Castings (a.k.a. Worm Poop).
4. Add Tea or Castings to your plants and watch them thrive!
Let me show you how my worn bin/container works. First, you need two Rubbermaid type storage containers, one lid, two bricks or pieces of lumber, and a power drill with a bit smaller than 1/8 inch. You can decide how large or small you want the container to be. Once you have chosen your bin size, place the two bricks in the bottom of the first bin. These bricks will allow liquid worm tea to drain from the top bin into the lower bin. Next, use the drill to make holes in the sides and bottom of the second bin. Also make holes in the lid. The holes will provide ventilation (from sides and top) and drainage (from the bottom). The bin with the holes nests inside the first/lower bin, raised up by the bricks. The lid goes on top of the bin with the holes.

The worm bin - two containers, the one with air/drainage holes nested inside the solid bin.

Air holes in the worm bin - drill them in the lid, the sides and the bottom.
Once you have your worms, you need to create a "bed" for them, using shredded newspaper, cardboard, wood shavings, etc. Keep this bedding moist. Now it's time to feed them! There are LOTS of different opinions on exactly what you can feed your worms. Good candidates for the worm box are fruit and veggie scraps, coffee grounds, eggshells, leaves or house plant trimmings, and the like . Make sure you give them a good mix of carbon (brown, dead stuff such as newspaper, cardboard, leaves, etc) and nitrogen (green, live stuff such as kitchen and garden scraps).
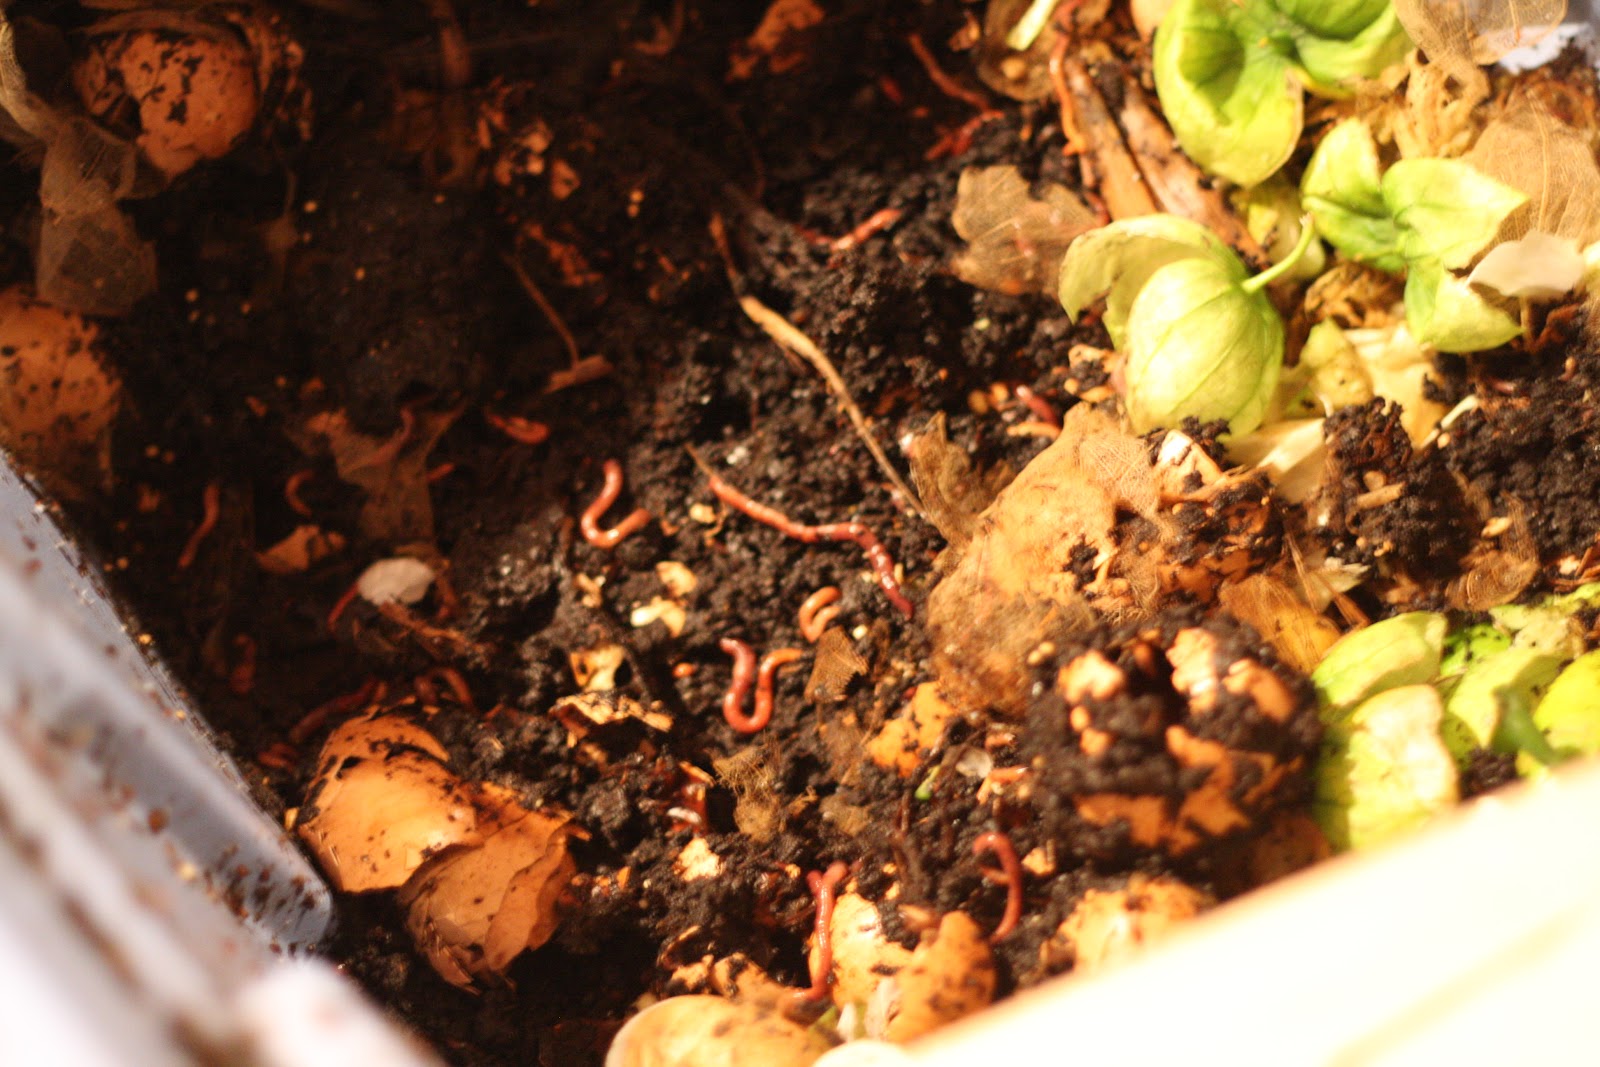
Worms and scraps inside my worm bin. All the black stuff is worm castings (poo). My bin is a little too wet right now. I should add more carbon (newspaper, cardboard, leaves, etc.) and remove some of the castings.
After a while, pull the bins apart and see if your worms have produced any worm tea. This stuff is liquid gold! Pour it into a container and add some to your watering can when it's time to water plants. You can also harvest the worm castings, but I have not embarked on that adventure yet, so I have no advice. I believe it involves moving all the castings to one side of the box and putting all the new bedding and food on the other side. The worms will eventually migrate to the food, leaving the pile of castings behind for you to harvest. These castings are incredible to add to your potting soil mix or sprinkle in your garden.
Pull the top bin out and check to see how much worm tea is in the bottom bin
This is a just a quick peek into how we do it over here. I am no expert on worm farming, so make sure you do some research on your own. There are several great on-line resources, including this site here. I found it to be enormously helpful!
So how much produce/scraps can your worms eat? Well, that depends on several factors, but I've read that a pound of worms can eat about a pound of food a day. How does one measure how many worms they have, you ask? I don't know. I simply keep adding feed until they can't keep up and then let them work uninterrupted for a week or two. Since we have chickens, hogs and a cow, most of our scraps go to them. However, during the winter months, I often find it easier to carry the scraps downstairs, instead of trudging out to the barn in the snow. Our worm bin certainly can't consume all of our scraps, but they can handle a good amount, especially things like jalapeno pepper scraps, which the animals don't care to eat.
Worm farming is fun and it's always enjoyable to see the looks of disbelief of people's faces when you tell them you have a huge container of worms in your basement. It's quite the conversation starter. Apparently Lloyd was not so "dumb" - worm farms really are a good idea!
That's really cool! Does it stink?
ReplyDelete--Alaine
Not if you manage it well (right mix of carbon and nitrogen). Mine is a little stinky right now b/c it's too wet, but it doesn't smell "bad". It just smells extra "earthy", if that makes sense. You probably wouldn't want to keep the bin in a main living area of your house - basement or utility room would be best (garage might be too cold in the winter).
ReplyDeleteThis sounds like something I need to do! Do you use newspaper/cardboard for the brown dead stuff? or something different? I have concerns about the "ink" from cardboard and newspaper leeching into my garden. Have you read anything about this?
ReplyDeleteJennifer, I often use newspaper or dead leaves. Cardboard can be a little iffy, but from what I understand, most newspaper is safe, because the ink is soy-based.
ReplyDeleteA good place to start is with "Worms Eat My Garbage" by the late Mary Appelhof (Portage, Mich), available in most libraries.
ReplyDeleteAlso, I have written an illustrated guidebook for medium-sized vermiculture "Beyond Compost, +" and have a blog at http://abonochar.blogspot.com that you may find helpful.