Pages

Monday, May 28, 2012

Putting in the Garden

I've been working hard the last few weeks, trying to get the garden ready.  Last week I finally turned over and prepped the last garden bed.  Whew!  That makes for 26 garden beds, each one about 4'x 16', which means I've been handling a lot of dirt and manure.  I'm glad I won't have to do that again for a while...

With my old 200 sq foot garden, I could usually get everything planted in one or two days.  This new 4000+ sq foot garden has taken much longer - no big shocker there.  I've been putting in plants started in the basement and planting seeds, little by little since the end of March.  As the weather warmed, I've been scrambling to get my warm weather plants in the ground - tomatoes, peppers, tomatillos, etc. 


Onions ready to be planted - these were started in the basement under grow lights, along with all my tomato, pepper, broccoli, celery, and herbs plants.


My style of gardening is based on companion and succession planting.  By this I mean that I like to plant several different types of plants in the same bed that will be beneficial to each other (companion planting) and I combine plants that will mature at different times, making sure I never have empty beds (succession planting).  Planting beds of one single crop is an invitation for disaster.  Once a pest insect discovers the bed, there is no stopping it from decimating the crop.  It's so easy for the pest to hop from one plant to the next.  This is why mono-cultures of crops (growing one crop in an area) are such a poor idea and require massive amounts of pesticides.  By mixing several types of plants together, the pests are confused and often die before they can find their food source. 

One example of companion and succession planting is the bed below. In this bed, I have Sugar Snap Peas, Spinach, Garlic and Tomatoes (the tomato plants are small, so it's hard to see them). The spinach matured first. We've been eating spinach for breakfast, lunch and dinner the last 2 weeks. Next will come the peas. In the meantime, the tomatoes will be growing larger, shading the spinach plants so they can keep on producing (spinach doesn't like hot weather and benefits from being grown in shade in the summer). By the time the tomatoes are starting to take over the bed, the peas will be finished and I will tear them out and perhaps plant some pole beans to climb the trellis instead. The garlic will be harvested in late summer/early fall, repelling bugs from the tomatoes all summer long (most insects dislike the smell of onion and garlic plants).  Now is also the time to plant Borage, a flower that has been shown to repel Tomato Hornworms, which are, in my opinion, the most vile and disgusting creature I've ever seen (I may or may not have been know to scream like a little girl when I discovered one of these in my garden).  They are HUGE and will destroy your tomatoes.  Ever since I started planting Borage alongside my tomatoes, I have not spotted a single Tomato Hornworm... much to my relief (I have the heebiee-jeebiees just thinking about them.  Ugggg).  As an added bonus, the flowers are beautiful and attract honeybees.


Garden bed with Spinach, Sugar Snap Peas, Spinach and Garlic

I've also planted several other flowers throughout the garden, such as marigolds, petunias, zinnias, cosmos, poppies and sunflowers to attract beneficial insects that will keep my pest insect populations down.  I cannot advocate using pesticides in the garden.  Not only is there a risk to human health, but pesticides do not differentiate between beneficial insects and pest insects.  They kill everything.  Unfortunately, pest insects are able to reproduce faster than the beneficials, so they will eventually come back to your garden and wreak even greater havoc because there are no beneficial insects to control their population.  It is a vicious cycle and every time you spray a pesticide, the problem gets worse.   Accept that sometimes the insects will win, no matter what organic pest control options you try.  We cannot control every aspect of nature.  We are not God.

This year, I decided to try planting potatoes again (I'd had minimal success with them in my old garden).  In case you didn't know, potatoes tubers grow underground, but the plant itself grows above the ground.  It looks much like a tomato plant (and it should, because they are in the same plant family, Solanaceae  or "nightshade", which also includes pepper and eggplants).  As the potato plants grows, it is customary to pile soil up around the plant (or mulch heavily with straw), leaving only the top few leaves exposed.  This is called "hilling up" and is done in order to keep the potato tubers from being exposed to the sun (potatoes turn green and toxic if exposed to sunlight, which is why they should always be stored in a cool, dark place). 

Instead of planting my seed potato 3-4" deep and hilling it up gradually over the summer, I decided to try the "post hole" method, which is just as it sounds.  I used a tulip bulb planter instead of a post hole digger to dig a small hole about 12" deep.  In each hole, I dropped a seed potato (which are basically old potatoes that have been allowed to grow sprouts from their "eyes") and covered it with about 3 inches of soil.  As the summer goes on and the plant grows taller, I will add more soil to the hole.  I'm sure I'll still have to do some hilling, but this way I won't disturb the entire bed as much and I can put other plants in as well, instead of wasting a whole bed on potatoes.  If you decide to plant potatoes, it is possible to use potatoes from the grocery store, but I would highly recommend only using organic potatoes.  A much better option would be to seek out certified seed potatoes from a reputable source.  I purchase my seed potatoes from Fruitbasket Flowerland.  They have an excellent selection of potatoes, including many organic varieties.  I LOVE this store!!!  In my opinion, they have the best selection of seeds in West Michigan. 


Seed potato in the 12" hole, ready to be covered up with soil


The garden is never truly "finished", as I will be planting more rows of veggies over the summer to extend the harvest and fill in empty garden beds.  For example, snap beans will be planted a few weeks apart, so that I don't end up with a huge amount all at once.  Lettuce will be planted where ever I have a spot available for it.  Here is what I have planted so far:

Tomatoes
Peppers (hot and sweet bell)*
Peas
Cucumbers (slicing and pickling)
Potatoes
Bush Beans
Pole Beans
Lettuce
Spinach
Onion
Garlic
Broccoli
Kohlrabi
Kale
Tomatillos
Beets
Swiss Chard
Brussel Sprouts
Celery
Asparagus
Radishes
Sweet Corn
Pumpkins
Winter Squash
Carrots
Basil
Dill
Cilantro


*Note about pepper plants:  Be sure to place your sweet bells as far as away as possible from your hots.  One year, I planted them right next to each other and the plants cross-pollinated, meaning they took on the characteristics of each other.  It was quite a surprise to take of bite of a bell pepper and have it burn my mouth!  And likewise with the Jalapenos - some were mild as a bell pepper, while others were super hot.  We never knew what we were going to get - it was like playing Russian Roulette.  We've since learned to separate them!

That's about it for the vegetable garden.  Recently, I bartered with a neighbor for some Everbearing strawberry plants and Heritage raspberry plants.  She wanted some of the old straw in our barn in return (she will use it to hill her potato plants).  I felt like I got the better end of the deal!  We don't have our fruit orchard planned out yet, so I had to make some quick decision about where to plant them, which I may regret someday, but oh well. At least I've got a few plants in so we can harvest some berries next summer!

Well, I'm off to go do some weeding.  Oh, the never-ending task of weeding.  You're more than welcome to come over and help!  Please?!?

Saturday, May 26, 2012

Omega -3 Granola

Over the last few years, we've slowly been eliminating processed foods from our diet.  Some items were easy to replace, but I've struggled to find a good substitute for dry cereal.  My son adores cereal and will always choose it, even when I offer to make pancakes or waffles instead.  After checking out nearly every box of cereal in the breakfast aisle, I have come down to pretty much the only cereal option I am comfortable with - plain old Cheerieos (and not the knock-off brands - I found the have the preservative BHT in them instead of vitamin E, like real Cheerios).  They have less than 5 ingredients and only one gram of sugar per serving (I won't purchase anything that has over 5 grams per serving).  But Cheerios are still a highly processed food, which I'm not comfortable with.  The grains are extruded, forced through machines to make the "O" shape.  So, I've been trying to come up with my own version of cold cereal to replace the beloved Cheerios.  My son is still not sold on this granola (mostly, I think , because it does not float in the milk like Cheerios), but every one else in the family goes ga-ga for it.  I crave this stuff.  It's delicious with milk or as a topping for yogurt.

Unlike many other granolas that are loaded with sugar and Omega-6 oils (corn, soy, canola, sunflower, safflower, etc.), this recipe uses only honey as the sweetener and is rich in Omega -3's (found in the olive oil, walnuts and ground flax seed).  Your body needs both Omega-6 and Omega-3 fatty acids, but the average American diet consumes way too much Omega-6 and not nearly enough Omega-3.

Try this recipe yourself, but be warned - it won't last long!  If you have 2 rimmed baking sheets (I don't.  Boo.) you could make a double batch and save yourself some time and work. 


Omega-3 Granola

  • 1/3 cup slivered almonds (or you can just chop up some whole almonds- I usually don't measure, just grab a handful and chop them up)
  • 1/3 cup walnuts (optional - I rarely have these in the house)
  • 3 cups old-fashioned rolled oats (NOT quick cooking or instant oats)
  • 3 tbsp olive oil
  • 1/4 cup of sunflower seeds/nuts (again, I just grab a handful)
  • 1/4 cup pumpkin seeds, the shelled kind (a handful)
  • 1/2 cup honey
  • 2 tbsp ground flaxseeds
  • 1/4 tsp salt
  • 1 tsp cinnamon (optional)
  • 1/2 cup raisins (optional - we prefer it without raisins)

1.  Preheat the oven to 325 degrees.  Toast the almonds (and walnuts, if using them) in a large skillet over medium heat, stirring often until fragrant and beginning to darken, about 3 minutes.  I use my cast iron pan for this.


2.  Stir in the oats and the oil and continue toasting , until the oats begin to turn golden brown, about another 2-3 minutes.  Then add the sunflower seeds and pumpkin seeds, and toast an additional 2 minutes until the whole mixture is golden and fragrant.

3.  Turn off the heat and stir in the flaxseed, salt and cinnamon.


4.  Now drizzle the honey over the dry mixture, stirring to coat everything well.

5.  Transfer the mixture to a rimmed baking sheet and spread it out so it can bake evenly.


6.  Bake for 15-18 minutes, stirring every few minutes.  Watch it closely at the end of the baking time.  It can go from "just right" to "burned" very quickly.  You want the granola to be a rich brown color.  It will not be crispy when you remove it from the oven.  It will crisp us as it cools on the counter.

7.  Remove the finished granola from the oven and stir in the raisins, if you are adding them. Then use a spatula to shove the granola to one half of the baking sheet.  Press down gently to create a slab of granola.  Allow the granola to cool completely, about 30 minutes. 


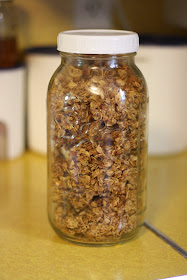
8.  Use a sharp edged spatula/turner to scrape up the granola and transfer it to a container.  It will break up into chunks.  This recipe makes enough to fill a half-gallon sized canning jar, about 6 cups.


I have no idea how long this granola will last on the shelf.  At our house, it is never sitting around for longer than a week!  However, I am fairly confident that the granola would stay good for several weeks if kept in an airtight container. 
Enjoy!!! 

Wednesday, May 23, 2012

"Don't Stop Bee-lieving..."

"...hold onto that feeeeelin'."  Sorry about the lame bee pun.  My husband has decided I should have a bee pun in the title of all my bee posts.  Silly husband.  I'll try to humor him.  And now you're going to be singing Journey all day.  Ha.  Gottcha.

Anyway...  So, I DID IT!  I successfully transferred the bees from their temporary "nuc" boxes into their permanent hive.  And no, I did not freak out and no, I did not get a single sting.

My beekeeping jacket and veil, smoker and hive tool arrived last Thursday.  When the UPS man dropped it off, I was so nervous about dealing with the bees that I didn't even open the package.  Finally, on Friday, I decided it was time to get over my fears, so I donned the jacket and veil, pulled on some food handling gloves (because I was too cheap to buy beekeeping gloves),  fired up the smoker and headed out to the bee yard with my hive tool.  I made my husband take photos to prove that I actually did it!


Me, trying not to look nervous


The smoker is basically a small can with bellows attached that you fill with a combustible material.  When you approach the bee hive, a few puffs of smoke at the entrance of the hive will cause the bees to halt their work and hunker down.  Apparently the smoke does two things:  One, it interrupts the bees communication.  They communicate using pheromones and the smoke interferes with the pheromones, essentially cutting off their ability to send messages to each other.  Two, the presence of smoke causes the bees to go into evacuation mode.  They think that the hives is on fire, so they they gorge themselves on honey, supposedly in an effort to gain strength to help them survive the exodus of the burning hive and the rebuilding of a new hive.  This gorging, as you can imagine, makes them sluggish and docile. 

I walked over to the beeyard and first opened up the hives so I could quickly transfer the frames from the nuc boxes.  After a few short puffs into the entrance of the nuc box, I mustered up all my courage and with sweat rolling down my back, I lifted the lid with shaking hands.  And then I was hooked.  It was a mix of pure exhilaration and awe.  I was still trembling, but I wasn't scared anymore.  Seeing all those bees was absolutely breathtaking. 


Prying the frames apart with the hive tool

Then I had to get down to business.  Bees are not especially fond of being disrupted, so I worked as fast as I could.  Each frame needed to be pried out of the box and transferred to the hive.  The hive tool, which is essentially a small pry bar, is needed to lift and loosen the frames, since bees produce a sticky substance called propolis that they use to fuse the frames together.  After the frame was loosened, it went into the hive.


"Killer boots, man!"  It's a good look, don't you think?


Holding a frame covered in a writhing mass of bees is a pretty incredible experience, I must admit.  However, in my excitement, I forgot to do a very important thing - examine the frames.  I'm not exactly sure what I'm supposed to be looking for, but I know I should have been looking for eggs in the frames, which would tell me that I have an active queen who is doing her job.  I was so focused on my task of moving them that it completely slipped my mind.


That's a LOT of bees


After all the frames were in the hive, I was left with a nuc box full of very confused bees.  I turned the box upside down over the hive and did my best to get them to fall into the hive.  I don't think they liked it very much.


Dumping the bees into the hive


I repeated this whole process with the other colony and it became apparent to me, even with my untrained eye, that there is a problem with the second colony.   When I lifted out the frames, I noticed significantly less bees.  And instead of nice, even cells in the comb, I spied some funny looking "growths" attached to some of the frames.  It almost looked like a peanut growing on the frame - it's hard to see it in the photo, but it's on the bottom right corner.


Frame from the second hive - notice less bees and funny growth on bottom right corner


After finishing up, I went inside to consult my bee books and the best I can figure, the presence of those kinds of cells indicates something is up with the queen.  Either she's not doing a good job or she is gone and the bees are trying to create a new queen.  Whatever is going on, it seems like this colony will not be as successful as the first.  And I have no idea what to do about this, if indeed there is anything I can do.

While I was inside researching, my husband noticed some strange activity on a tree limb about 15 feet from the hive.  He called me out to look at the hundreds of bees gathering on the limb and we both said "Crap. They're swarming".  Swarming is when the whole colony leaves the hives and looks for a new home.  They do this for several reasons, but mostly because they need a larger home.  Had I waited too long to move them to the hive?  In a slight panic, I called up Zeb, our bee guy, and he assured me it would be very unusual for them to swarm right now and if it was a swarm, the mass of bees would be the size of a football.  After a few tense hours, we noticed that the small mass of bees (it never got larger than baseball sized) was dissipating.  A few bees lingered for 2 days, but then they were all gone.  Whew!

Again, I went back to the books and I happened to stumble across a page that talked about how when a new queen takes over the colony, she flies out of the hive a very short distance and the drones (male bees) follow her out and mate with her.  When mating is complete, she flies back into the hive and the drones all die.  Were we in fact witnessing a new queen mating, not a swarm?  That might explain things, such as why the colony seemed so weak. So many questions!!!  I really need a mentor to come help this "new-bee".  In the meantime, I'll just keep muddling my way through it and consulting my handy books. 

In other news, the blackberry and raspberry bushes on our property are in full bloom right now and it makes my heart sing to see my lovely honeybees doing what God created them to do, pollinating so that we can reap the harvest of those delicious berries in late summer.  I hope that we will be able to collect a bit of honey from our bees this year, but even if we are not,  it's still awesome to have our own Pollination Team.  I beginning to see how this whole beekeeping thing can become such an enjoyable hobby!  I'll be checking in on the hives later this week to see how they are doing since the big move.  More updates later! 

Friday, May 18, 2012

How to Make Butter

"You make butter?", people ask me, flabberghasted.  I know that in their minds, they are envisioning me laboring over a butter churn for hours (wearing a Little House on the Prairie type dress, with my hair in braids).  Well, I'll let you in on the secret:  making butter is ridiculously easy.  And fun.  I first learned how to make butter when I attended a Cheese Making Class offered by Grassfields Cheese in Coopersville, MI (check them out - I love their reason for farming.  They are wonderful models of animal and land stewardship).

All you need to make butter is one ingredient:  cream.  If you are buying cream from the store, I would recommend buying organic, if possible.  The toxic chemicals in commercial animal feeds build up in the highest concentrations in the fat of animals, and since cream is fat, you want to make sure you're buying the best cream you can find .  If you live in West Michigan, you can find Hilhof Dairy products at some health and specialty stores -they are certified organic and the cows are grass-fed.  In Byron Center, where I live, you can find Hilhof Dairy cream at Byron Center Meats. 

We purchase our milk from a small farm nearby and since the milk is non-homogenized, the cream rises to the top after sitting in the fridge for about 24 hours.  After the cream rises, I skim the cream off the top using a ladle and save the cream in pint size jars.  When I have about two cups of cream, I'm ready to make butter. 

Here is the secret to make butter the easy way:  A blender.  This baby will do all of the work for you.  About 30 minutes before you make the butter, set the cream on the counter to warm up.  Room temperature cream will work better than chilled.  If you forget this step, it's not a big deal, but it will be easier with warmer cream.  Pour your cream into the blender.  Make sure you don't fill it more than halfway.  I usually put in about 2 cups of cream.


Next, you turn on the blender to a medium speed.  And here's the best part - you can walk away and just leave it running for the next few minutes while you do something else.  Listen to the blender - you will hear the noise level change as the cream turns into whipped cream and then finally butter.

After about 2-3 minutes, I stopped the blender to check the progress.  You can see that it's still at the whipped cream stage.  Sometimes at this stage the cream gets a little thick and I need to carefully stick a spoon in the top to stir it and get it moving again.


Turn the blender on again and let it run until you hear a "sloshing" noise.  This means your cream "broke" and seperated into butter and buttermilk.  Ta-da!  You did it!  This whole process in the blender should take 5-8 minutes.


You are left with a blender full of butter floating around in buttermilk.  You can discard the buttermilk if desired, but I like to save it and use it for baking - it's great in pancakes (like these cornmeal pancakes ), buttermilk biscuits, cornbread, etc.  To save the buttermilk, I place a fine mesh sieve over a jar or bowl and pour out the contents of the blender.  Gently squish the butter into the sieve to remove as much buttermilk as possible. 


Now for the fun part - the butter needs to be washed to remove all the traces of buttermilk.  To do that, wash your hands first and then fill a bowl with ice cold water (sometimes I do add ice cubes if it's hot in the kitchen).  Squash the butter between your hands or against the side of the bowl.  You will need to change the rinse water several times.  Keep washing and rinsing the butter until you see no trace of white liquid when you squeeze the butter. 


If you prefer salted butter (as I do), now is the time to add the salt.  I sprinkle about 1/4 tsp of salt on the butter and quickly knead the salt into the butter (the heat of your hands can make the butter melt, so do it fast!).    You could also make flavored butter at this time - add a little minced garlic and parsley and you've got a great garlicky bread topping, or whatever your little heart desires. 


Now the butter is ready!  You can use it immediately or store it in the freezer. If you are feeling super artsy-fartsy, you can buy those little candy/lollipop molds at the craft store and press the butter into the molds.  Pop them in the freezer and now you have adorable little pats of butter in the shape of a heart, flower, etc.  Embrace your inner Martha.  Kids eat this stuff up (literally).

 I usually roll the butter into a log shape and wrap it in a piece of parchment paper.  The neat little package can be dated and then popped into a freezer bag in the freezer for later use.  It's helpful to also weigh the butter before storing it.  From the 2 cups of cream I used, I got about a 1/2 pound of butter and nearly 2 cups of buttermilk. 


There.  That wasn't so hard, was it?  Sorry Ma Ingalls... churns are so out of fashion.

Wednesday, May 16, 2012

To Bee... or Not to Bee...

What farm would be complete without it's own bees to pollinate the crops and produce delicious honey?  Or so we thought...  Right now, I'm feeling a bit apprehensive as I think about the 2 colonies of bees waiting for me in the backyard.  What if I can't do it?  What if I freak out while checking the hives and send them into an angry, stinging tizzy?  Ok, maybe I'm being a little over dramatic...


The two empty hives of either side of the smaller"nuc" boxes.  Each box contains one bee colony that will need to be moved to the hives soon.


Like many people, I have always been fascinated by the idea of beekeeping.  It sounds so "one with the earth", almost mystical in a way.  It seems the more humans learn about bees, the more we realize how little we actually know about them.  I've been reading beekeeping books for about a year now and while I feel as though I have a vague idea of how to care for them, I have a feeling I'm about to find out how clueless I really am. 

John and I wanted bees for the obvious reason - the delicious honey!  But we're also slowly building a small fruit orchard and we have a large garden, so I was keen on having our own pollinating team on board with Third Day Farms.  Having some beeswax around would be nice too - I make my own lip balm and lotions using beeswax.

A few months ago we contacted a fellow by the name of Zeb who runs hives and sells the raw honey (if you live in West Michigan and want to purchase some of his honey, contact him at zbeeshoney@gmail.com).  Oh boy, is this goooooooooood stuff!  Zeb doesn't heat his honey, just filters it, so you get all the bits of pollen, tiny particles of honey comb, etc.  Raw, local honey is said to have many health benefits, including protection from allergies.  The theory is that by ingesting small amounts of local honey, you are being "vaccinated" with the pollen of plants that cause your allergies.  There has not been enough research conducted to prove if this theory is correct, but I will share that since we starting buying local, raw honey, my husband's terrible seasonal allergies disappeared.  Completely.  No more expensive allergy medications with crappy side effects (and filled with who knows what).  Honey is a much tastier and healthier medicine, wouldn't you agree?  Try it.  It certainly can't hurt and it just might help.  And you will be supporting a local farmer!  You've got nothing to lose.  Just make sure you buy raw honey - heating destroys the benefits.  I don't think raw honey is sold in grocery stores - if you want some, either contact Zeb, check at a farmers market, or look on Craigslist. 


Half gallon of delicious raw honey


When we went to pick up our gallon of honey (I use it for making homemade granola and Honey Oatmeal Bread - it's most economical to buy in bulk and honey does not expire), we ended up asking him a bit about keeping bees.  Upon further discussion, John and I decided we would like to try our hand at beekeeping, for the reasons mentioned above.  I contacted Zeb a few weeks later, and he graciously agreed to help get us set up with some hives and colonies of bees. 

So after driving home in the car with thousands of angry bees in the backseat, here I sit with 2 empty hives in my backyard and two boxes full of bees.  Each box contains a colony - basically a queen and all her minions.  My job in the next few days is to move the bees out of the box and into the hives that will become their permanent homes.  It shouldn't be hard.  When I picked up the bees from Zeb, he was kind enough to demonstrate the technique for me, how you smoke the bees and then lift the frames out of the box, covered in swarming bees.  Watching him work, I thought to myself "Well now, that doesn't look so bad.  I can do that!".  My fears were abated... for now.  It might be a different story when I'm the one out there by myself surrounded by those buzzing bees!  But really, fears aside, I was able to observe how gentle the bees are.  They are not aggressive.  They don't want to attack.  They just want to be left alone.  I think I can do this.  I think....


A peek inside the empty hive.  There are currently 5 frames hanging in this hive.  The queen will lay her eggs in the cells in these frames and some cells will be filled with honey for the bees to eat.  This frame is full of honey and will be a food source for the bees as they explore their new home turf and create a established colony in this hive.  The "nuc" boxes shown above also contain 5 frames.  Those 5 (with the bees crawling all over them) will to be added to the 5 in the hive, making a total of 10 frames in the hive.  

My bee suit and smoker should be arriving any day now.  When they arrive, I'll have no excuse to wait any longer.  Gulp.  Here we go.  Wish me luck!

*You may notice I didn't use much fancy beekeeping lingo in this post.... that's because I really don't know what I'm talking about.  I'm not going to lie and act like I know more than I actually do.  You're going to have to learn as I do!  It's like learning a whole new vocabulary - a bit overwhelming at first, but I'm sure I'll catch on sooner than later, right?

Saturday, May 12, 2012

12 Commandments of Food

About 2 years ago, I was reading a magazine and ran across this little article by Michael Pollan, called "The 12 Commandments of Food".  Immediately, I ripped it out and stuck it on my fridge... and it's there to this day, even after we moved to a new house with a new fridge.  I love the simplicity of these "commandments" - no crazy rules, no "latest and greatest" diet advice, just pure common sense.

If you have never heard of Michael Pollan, I encourage you to consider reading his books.  They are thoughtful, challenging, informative and humorous.  I particularly enjoyed "The Omnivore's Dilemma" and "Food Rules".  He is also featured in the documentaries "Food Inc." and "The Botany of Desire".   Check him out.  It's good stuff. 

Without further ado, here is the list:

12 Commandments of Food
1.  Don't eat anything your great-grandmother wouldn't recognize as food.

2.  Avoid products containing ingredients you can't pronounce.

3.  Don't eat anything that won't eventually rot.

4.  Avoid food products that carry health claims.

5.  Shop the peripheries of the supermarket; stay out of the middle.

6.  Better yet, buy food somewhere else: the farmer's market or community supported agriculture.

7.  Pay more, eat less.

8.  Eat a wide variety of species.

9.  Eat food from animals that eat grass.

10.  Cook, and if you can, grow some of your own food.

11.  Eat meals, and eat them only at tables.

12.  Eat deliberately, with other people whenever possible, and always with pleasure. 


I've had two years to read this list countless times and contemplate each "commandment".  Let's go through these rules and discuss them a bit.  What do these rules mean to you and how would you life be different if you followed them???  Here are my abbreviated thoughts...

1. Don't eat anything your great-grandmother wouldn't recognize as food.
-I think this has been the most life-changing rule for us.  My great-grandmother wouldn't recognize a Pringle as food.  Or a Fruit Roll-up or Pop-Tart.  Or Oreos.  Or Cheetos.  Or Go-gurt (notice all these are trademarked foods?  Great-grandma wouldn't recognize a food with a trademark symbol on it).  Pretty much anything you buy in a package is suspect of not being "real" food (besides staple items, such as dry beans, rice, flours, etc.). 

2. Avoid products containing ingredients you can't pronounce.
-My world changed when I started actually reading food labels.  I pretty much ignore the nutrition information - I don't care about calories and fat grams (however I DO care about sugar grams).   If I read a label and can't recognize a word (or even worse, if it has a number, like Yellow #5), then that product is going back on the shelf.  Warning:  Once you start reading labels, you CANNOT stop.  You will annoy your friends and family - I even annoy myself. 
-Along this line, Michael Pollan has also stated that if a packaged food product (box of cereal, crackers, soup, etc.) contains more than about 5 ingredients, then it probably isn't a good choice.  There are always exceptions to the rule (like salsas made with lots of veggies), but overall this is a helpful guide.

3. Don't eat anything that won't eventually rot.
-Twinkies won't rot - at least not in your lifetime.  Lots of the snack foods marketed to kids don't rot.  If they don't rot and break down, then what are they doing in your body?  Do they linger for years in your body? These foods are chuck full of preservatives and other nastiness that you don't want residing in your body.  Ever seen those photos of McDonalds hamburgers that people have kept for years?  They still look the same as they did the day they were made ( a real burger and fries would be nasty in a few days).  This is not normal.  This is not food.   Trust me, you do NOT want this stuff in your body.   Happy Meals are not a good reward or treat for your kids. 

4. Avoid food products that carry health claims.
-This one fills me with righteous fury.  I feel bad for the grocery shopper of the family.  With so many packages and labels touting the "health benefits" of their product, how are you supposed to figure out what is legit and what is crap?  For heavens sake, they are even marketing a cookie right now that is "delicious and nutritious".  I don't care what you say, a cookie is NOT nutritious. Cookies are not health foods.  Don't get me wrong,  I'm not against cookies.  I love cookies.  But call it what it is - it's a dessert, a special treat, junk food.   I get angry when companies are trying to trick shoppers into thinking junk food is a healthy choice.  Another example is yogurt.  Yes, yogurt is a health food - but only the plain yogurt (you can add your own honey and fruit, if desired).  All those other choices are loaded with sugar (or high fructose corn syrup), preservatives, fillers, and artificial colors.  Those are NOT a healthy choice.  Notice there are little to no health claims on plain yogurt.  Argg.  I could rant about this for a long time.  Just follow the rule:  If they feel the need to shout out their health claims, then they are probably trying to hide something else.  Skip it altogether.

5. Shop the peripheries of the supermarket; stay out of the middle.
-I'm working on this.  For the most part, we buy very few processed foods.  I do spend a bit of time in the "ethnic" aisle, as I purchase staple items like whole wheat pasta, pasta sauce and supplies for Mexican meals.  The baking aisle is also a heavy hitter for me, as I make all our baked goods from scratch.  But I usually completely skip the cookies, snacks, chips, salad dressings, soups, packaged foods, etc.  Not much good to be found in those aisles. Most of my time is spent in the produce department.

6. Better yet, buy food somewhere else: the farmer's market or community supported agriculture.
-This can be tricky, depending on where you live.  Here in West Michigan, there are no shortages of Farmer's Markets in the summer, but finding local produce year round is work.    West Michigan Coop is a good organization to join if you want access to foods from local farmers year round.  Currently, we purchase our beef from Woodbridge Dairy Farm.  They also have pork and chicken available at times.  I also purchase meat from Byron Center Meats.  As for dairy products, we purchase milk from a small family farm nearby and I use that milk to make our own cream, yogurt and butter.  Yes, it's more work to buy food from different sources (instead of buying everything at the supermarket), but I like supporting local farmers whenever I can.

7. Pay more, eat less.
-Stop complaining about food prices.  Did you know that Americans spend less of their income on food than any other country in the world?  The latest stat I saw showed that Americans spend less than 10% of their income on food - most other countries spend at least 2 or 3 times that amount.  America also has the highest health care costs of any country in the world.  Coincidence?  I think not.  Crappy food = crappy health.  You get what you pay for.  If you can afford cable TV and a cell phone, then you can afford to buy good food.  I know, I know, money is tight.  It is for us too.  Cut out the crap (soda, snacks, junk food, juice, candy, gum, etc.) and you will be amazed how much you can save.  I hold each item in my hand before it goes in my cart and I ask myself "Will this food nourish us?  Is this food worth spending our hard earned money on?"  And for goodness sakes, stop blowing you food budget on beverages.  Juice is a waste of money - try eating real fruit instead.  Soda is terrible - absolutely no redeeming value there.  Your kids don't need to drink milk all day - one cup will suffice.  Try water instead.  Your body and budget will thank you.

8. Eat a wide variety of species.
-Branch out.  Try something new.  There are lots of vegetables out these besides carrots and potatoes.  Try different types of meats and fishes.  Eating a wider variety of foods will also help your body obtain a wider variety of nutrients.

9. Eat food from animals that eat grass.
-I'm not going to go into all the details here about conventional vs. grass-fed meats.  All I'll say is that the conventional way of raising animals is horrific for the animals and potentially dangerous for human health.  America is engaged in a giant experiment right now, something that has never been attempted in human history - pumping animals full of foods they were not designed to consume and drugging them continuously to keep them alive in these inhumane conditions.  These are not healthy animals.  I didn't sign up to be part of this experiment, did you?  Remember, you are what you eat... and what you eat EATS.  Seek out meat from grass-fed animals.  Yes, it will seem more expensive, but in reality they are charging the true price for meat (and if cost is a problem, start cutting back on meat.  Most of us eat too much meat anyway).  Conventional meat is raised on feed that is subsidized by taxpayers, so the cheap cost is simply an illusion. 

10. Cook, and if you can, grow some of your own food.
-I'm sorry to break it to you, but if you want to eat better, you are going to have to learn how to cook.  Nothing fancy, but you will need to learn some basics.  I've been slowly learning how to cook from scratch.  It's not hard.  It just takes time and the willingness to make mistakes.  "But I don't have time to cook!", you say?  Well, if something is important to you, you will find a way to make it happen (thanks for that lesson, Dad).  Maybe you cook double batches of meals and freeze the second meal for a busy night when you need something quick.  Maybe you try the "once a month" cooking method.  Delegate.  Teach your kids to cook and make them responsible for dinner one night a week.  Find a way.  Find the time.  I keep seeing these stats about how much TV Americans watch and it sickens me.  If need be, get a TV in the kitchen so you can do food prep and cook while watching your shows.  As for growing food, I know it's not for everyone, but I think every person should at least TRY growing something.  If anything, it will give you a greater appreciation for just how much work it takes to produce food!

11. Eat meals, and eat them only at tables.
-When my husband and I bought our first house, we couldn't afford furniture.  We lived for a year with no couches or living room furniture.  But as soon as we scraped up a bit of cash, my husband went out a bought a used dining room set.  It was extremely important for us to sit down together for meals.  It was how we connected each day.  Fast forward 10 years and I still think the dining room table is the most valuable piece of furniture we own.  This is where we gather as family, where we pray together.  Eating meals in front of the TV just doesn't cut it.

12. Eat deliberately, with other people whenever possible, and always with pleasure.
-Eating should be enjoyable, an experience to share with loved ones.  I love having people over for dinner.  This is something basic and beautiful about breaking bread with others.  Inviting people over for dinner also encourages you to cook a wholesome meal, instead of just mixing up a box of Mac & Cheese.  Even if you don't invite people over for dinner, I feel it is vitally important for families to gather together to eat meals, even if it's only once a day. 

In conclusion, I feel like I should add one more Commandment:
 13.  Every once in a while, ignore the 12 Commandments.
-Don't be so legalistic.  Lighten up a bit.  We try to follow something know as the "80/20 principle", which means we do our best to stick to real, healthy food 80% of the time and the other 20%, we allow ourselves to indulge in some not so great choices.  Like going out to eat.  Eating out is difficult because you don't know where the food came from or how it was prepared.  We try to avoid the worst offenders (no fast food for us) and don't sweat the rest of the places.  We go out for ice cream in the summer, even though I'm positive the ice cream is chuck full of high fructose corn syrup.  We eat candy, cookies and other treats when we're at parties or other people's homes.  By keeping those items out of our house, we end up eating those things truly in moderation. You simply cannot control every food situation.  Stop driving yourself crazy. 
 -There is also something to be said about being a gracious guest -  you can politely decline a food offered to you by a host, but keep your comments, judgements, and thoughts to yourself.  You are the guest and you should be thankful for what they offer you, even if it's not something you would choose.  Don't be a snob. 

Ok, brain dump complete (although I feel like I could go on and on and on...).  What are your thoughts about these Commandments? 

Wednesday, May 9, 2012

Chew on This

I'll just come out and say it: We've bitten off more than we can chew. It's a rookie mistake. We simply let things get out of hand. In our eagerness to get this farm back into shape, we have taken on too many tasks at once.

Since the middle of March, we have been frantically scrambling to complete a multitude of tasks. We know that we're making progress, but it's difficult to take pride in those accomplishments in the face of enormous amounts of work that still need to be completed. It's only the beginning of May and we are already exhausted. And we have no one to blame but ourselves and our agendas. None of this has to be done. We simply want it done. I'm not looking for sympathy here - this mess is our own doing.

The garden has been a huge undertaking and we're still not finished. Here's what we have done in the garden since March:

-Tilled entire garden (4,300 sq. ft)
-Cut down trees and dragged logs to garden to create twenty-six 4'x16' beds
-Scalped 3-4 inches of dirt from pathways around all the beds and added that dirt to beds
-Laid down thick layer of newspaper on all the paths
-Covered newspaper with layer of hay (which is hauled out of the barn, one wheelbarrow load at a time)
-Spread 2 trailer loads of goat compost into garden beds (that's a lot of poo)
-Turned over all the garden beds to incorporate compost (involves digging down about 2 feet and loosening the soil)
-Fenced in the garden
-Painted said fence
-Ran chicken wire all around the fence, burying it 8 inches to keep out bunnies (and pesky chickens)
-Built trellises for peas


Whew. I'm tired just looking at that list. There is still work to be done, but I feel like we're in the homestretch (well, until it's comes time to plant everything). While we work, we keep saying to each other "Won't next spring be nice???" Next spring, we won't have to do all this mumbo-jumbo. We'll just turn over the beds and be ready to rock. Ah, next spring...

As for the rest of the homestead, things are changing everyday. My husband has been working tirelessly for the last 3 weeks, attempting to fence in our pasture areas (just shy of 2 acres, I think - we're dividing it into several paddocks so we can do rotational grazing). Fencing is major work. Measuring, digging post holes, putting in posts, running wire, hanging cattle gates. I never imagined it would be so complicated and time consuming.


We're rushing to get the fencing done because we've made tentative arrangements with a family down the road to "borrow" their horse and yearling calf. If we don't have animals mowing the pasture, then WE have to mow it every week... and it's mucho dinero to mow that much land that often. We also want to get the pig pen/run fenced and ready to go as well. That needs to be done ASAP if we plan on getting pigs this year. I was ready to throw my hands up in defeat and tried to convince my husband that maybe we should take a breather and just get pigs next year. However, as he pointed out to me, the area where we're going to keep the pigs is wild and woolly, desperately needing to be tilled and plowed. We were counting on the pigs doing that work for us and if we don't get them, the land will be out of control. Pigs it is.

After the fencing is complete and the pig run secured, we will need to address some animal housing situations. The pigs will need some sort of shelter and we need to figure out what in the world we are going to do with the 12 chicks in the garage.

There have been rumblings of getting meat birds this summer and laying out a strawberry patch, but at this point I'm so overwhelmed with projects and tasks that I can't even consider those things right now. What have we gotten ourselves into?!? I don't want you to get the wrong idea - we really are having fun. But boy, oh, boy are we tired.

Oh, and did I mention we're getting bees next week? And that I have no idea how to take care of them? And that we're trying to start a mini-orchard?  And that we're going to try to remodel the part of the kitchen and dining room?   That's it. I'm done. I'm going to bed to dream about next spring.

Tuesday, May 8, 2012

Awkward Chicks

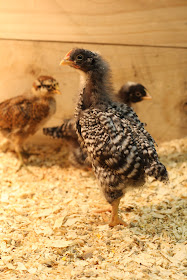
Our chicks are now almost 1 month old.  It's amazing to see how quickly they grow.  The gals (at least we hope they are all gals!) are entering into the awkward stage, where they are mostly feathered out, but still have some baby fluff.  They are looking more and more dinosaur-ish every day. 


The biggest chick.  She's been dubbed "Gigantor".


Last Friday, we were given 2 more chicks to add to our brood.  A friend's mom had ordered a few more chicks than she actually wanted and was looking for homes for 2 chicks.  We eagerly said "Yes!" and were delighted to learn that the chicks were Buff Orpingtons, the breed I had wanted to purchase this year, but couldn't find any at the right time.  Buff Orpingtons have a reputation of being docile, calm and friendly.  Already, I notice that they are much more chill than our Barred Rocks and Araucanas.  I've been doing my best to handle our chicks and get them used to being around people and our dogs, but the poor things freak out when I try to catch them and I wonder if I'm doing more harm than good.  A few of the Barred Rocks are starting to warm up to me, but the Araucanas are quite aloof.  The Buff Orpingtons don't mind being handled at all. 


The Buff Orpington chicks (on the left) - we're open to name suggestions... "Thelma and Louise"?


When the new chicks arrived, we weren't quite sure how to introduce them to the existing flock.  If you didn't know, the term "pecking order" originates from observing chickens.  They have a very complex social status and adding new chickens can upset the order and cause mass chaos.  Things can get ugly.  It's not unheard of for new chickens be pecked to death.  We were a little nervous, but decided to throw the new chicks in with the rest, hoping that they were young enough that the pecking order was not too firmly established yet.  After a few tense moments and a bit of pecking at the strangers, all seemed well.  We kept a close eye of them for about 30 minutes and when I checked on them an hour later, all the chicks were cuddling together, even the new girls. Whew! 

The same day we received the new chicks, I noticed that one of the Araucanas seems to have a problem.  Her beak is crooked and points down too far at the end. She can't close her beak.  I never noticed this before and I'm curious if something happened or if I simply wasn't paying close attention.  We're not sure if this a problem or not - will it affect her eating?  Will she grow properly?  She seems pretty small, especially compared to Gigantor, even though they are the same age (but different breeds, so maybe that is a factor).  Should we be concerned about this?  Time will tell, I suppose.

 
Poor little "Crooked Beak"


 I just realized now that we need to think about moving these gals outside soon (they are still in the brooder box in the garage).  We're still not sure what we're going to do - if we will build a separate chicken tractor for them or if we will attempt to immediately integrate them with our existing flock (they will be integrated eventually, no matter what we do).  We've got about 2-3 weeks to figure it out.  Better get on it!

Sunday, May 6, 2012

Getting Personal, Part 2

In my previous post, Getting Personal, Part 1, I shared with you why I decided to overhaul our personal care items.  Now, I must be clear - I'm still learning and discovering new ideas and methods everyday that shape my choices.  By no means am I an expert on natural, "green" personal care - I don't have it all figured out.  I simply want to share what we have been trying and it is my hope that YOU will share your ideas too!  We've discovered that finding personal care items that work for each individual is a process of trial and error.  We all have a different body chemistry, so what works for me might not work for you. 

So let's start at the beginning.  In my opinion, the best place to start is here:  Skin Deep Cosmetics Database.  If you haven't heard of this site created by the Environmental Working Group, check it out.  It is a priceless guide that will help you make informed choices about the products you use on your body.  Basically, you can type in the name of a product and they will give you the lowdown on that product - what is in it, what those ingredients mean and if they are harmful, it will tell why.  They also have a hazard rating system:  Green for "generally safe", Yellow for "use with caution", and Red for "watch out!" (these are my descriptions, not the websites).  You may not be able to find information about all the products you have, but their database is impressive.  They also have oodles of good information to help you choose safer products.  When I started making changes, I didn't throw absolutely everything out at first - we couldn't afford to buy all new products.  So I slowly started making changes as we used up our old stuff.  When it was time to replace shampoo or face powder, I went right to this site and researched my options before going out and buying something new. 

My gateway product into the world of natural body care was a bottle of Dr. Bronner's Magic Soap.  This stuff is legendary.  Not sure if it's because the product works so well or if it because of the insane amount of  text on the bottle.  That Dr. Bronner, he was one crazy cat.  We use this product as body wash for the whole family and shampoo for the kids.   But seriously, you can use this stuff for almost anything.  It's THE ultimate all purpose soap.  Body wash, face wash, shampoo, shaving soap, hand soap, dish soap, laundry soap, toothpaste (yes, some people use it for that!), all purpose cleaner.... you name it, you can use Dr. Bronner's for it.  As a fan of multi-purpose products, this makes me happy.  Why have countless other bottles when this one soap can do it all?  I'll admit, we don't use it for everything I listed about, but it's nice to know we could. 


Hair Care:  I've tried using Dr. Bronner's as shampoo, but it didn't work so well with my long hair (however, we've had great results using it on the kid's hair).  After trying several natural ingredient shampoos from the health food store, I still wasn't happy.  In desperation, I searched for alternatives and discovered a hair cleaning method called "No Poo".  No, I'm not talking about constipation.  The "No Poo" method (no shamPOO) involves using baking soda to cleanse the scalp and vinegar to condition the hair (check out more detailed instructions here ).  I was skeptical.  So I tried it.  By golly, it worked.  My hair had never felt so clean (is there anything that baking soda and vinegar can't do?!?).  Be aware that if your hair is used to being washed everyday with harsh detergents, your oil glands are working hard to produce enough oil to keep your scalp from being dried out.  Once you stop using detergent shampoo, there will be an adjustment period as your oil glands try to figure out what is happening (translation - you will have super greasy hair for a while).  I used this method for quite a while and was very happy with it, but to be honest, I missed the feeling of a good lather.  We've been so conditioned to think that lather equals clean.  So, I finally found a great line of shampoos and conditioners by Aubrey Organics that I adore.  At this point, I am using these products and the "No Poo" method, alternating about every other time I wash my hair.

As long as we are discussing hair, I should also mention two things:  One, I've never used hair product (gels, sprays, creams, etc.), since I hate the way they make my hair feel.  Because I don't use them, I really have done no research seeking out safer products.  All I know is I have read the ingredients labels on a few bottles and been dismayed by what I read.  You're going to have to do your own research on that one. 
Two, I'm not convinced that coloring/dying hair is safe.  I remember getting a packet of literature from my OB's office when I was pregnant with my son.  One of the pages was a question and answer format, on which the question was raised "Is it safe to dye my hair when pregnant?"  Long story short, no one really knows if it's safe or not - it's so hard to test these things and no one would willingly damage their baby for sake of research and testing.  The paper didn't really answer yes or no, it simply stated that there may be possible risks and high risk pregnancy women should avoid coloring their hair.  This got me thinking - if coloring hair is not safe for a developing baby, then it's probably not safe for the mother as well.  I don't have any concrete evidence that hair coloring is harmful, but I tend to lean towards "better safe than sorry".   Sorry, gals.  Hate to burst your bubble.  Why are we so afraid of gray hairs?  We all grow old.  There is no denying it.  It seems terribly silly to cover up something that is a mark of wisdom and distinction.  Consider the following verses from scripture:

"Gray hair is a crown of splendor; it is attained by a righteous life"  -Proverbs 16:31

"The glory of young men is their strength, gray hair the splendor of the old" -Proverbs 20:29

I've chosen to embrace my gray hairs and fully intend to be a silver fox as I grow older. Salt and pepper hair is the new sexy.

Facial Care:  I'm still trying to figure this one out.   Facial care can be very tricky, because I feel like our skin is changing all the time.  And what works for one person might be horrible for someone else.  Honestly, I can't say that I have ever found a face wash that I really liked... and I've tried quite a few.  For about the last year, I've been using the Dr. Bronner's soap to wash my face, followed by a swipe of diluted apple cider vinegar to restore the pH balance.  During the dry winter time, I sometimes get some dry patches, so I dab on a little coconut oil (FYI: coconut oil is also fantastic for removing eye makeup).  What?  Oil on your face?  Yes, I put oil on my face and no, it does not make me break out.  In fact, I think it prevents it.  Washing your face too often makes those oil glands go into overdrive.  I only wash my face once a day to keep my oil glands from overproducing.  Since I was 12 twelve, I've had terrible acne.  I went to several dermatologists, was on countless prescription creams and drugs, tried a million different cleaning products and regimens.  Nothing seemed to work.  Finally, about 10 years ago, I got so sick of it all and stopped washing my face in the morning out of sheer laziness.  And guess what?  My skin has been much better ever since - still not perfect, but an improvement.  I wonder if all those years I was simply washing my face too much, causing my oil glands to go bonkers (well, I think there were other culprits as well, but the over-washing was not helping).
 
My current method of washing once a day with soap is working ok, but I really want to try this, The Magic Mitt.  I've heard great things about it - the cloth cleans your face with plain water.  Now that sounds good to me!  Also, I'm considering trying the "Oil Cleansing" method, as explained here, on Crunchy Betty's site.   If you are into making your own facial care items, "Better Basics for the Home" by Annie Berthold-Bond is chuck-full of recipes and ideas. 

Ok, enough for one day.  Next time, we answer the burning question - what does Lori put on her arm pits?  Does she smell like a stinky hippie?   I'll also share some more natural body care tips.  In the meantime, I'd love to hear any ideas or suggestions you may have.  What is working/not working for you???

Friday, May 4, 2012

Cornmeal Pancakes

My children inhale these pancakes.  I cannot make them fast enough.  My husband has dubbed them "crack cakes", because, well, they're dangerously addicting.  You can't stop eating them.  Don't say I didn't warn you.

A few notes:  Make sure you buy "real" cornmeal, not the Quaker "enriched and degerminated" stuff they sell in the grocery store by the flours (we only use that for greasing and flouring bread pans, coating pizza peels, etc.).  Check at the health food store or head to the aisle with the Bob's Red Mill flours.  You want the "germ" and you don't want it to be "enriched".  Store extra cornmeal in the freezer so it doesn't go rancid.

I usually use the buttermilk I have left over after I make butter from our cream.  You can certainly use buttermilk from the store or even plain milk in a pinch.  It's easy to make a buttermilk substitute.  Simply add one tablespoon of vinegar to a measuring cup.  Now fill the measuring cup up to the 1 cup mark with milk.  Let sit for 5 minutes.  Volia.

You can use whatever type of flour you'd like, but we try to stick to whole wheat around here.  I like using King Arthur's White Whole Wheat flour.  Still whole wheat, but a lighter texture.  If you use whole wheat flours, it is best to let the batter rest at least 10 minutes before you use it.

I like to make this batter the night before and let it sit in the fridge overnight.  My children are so hungry in the morning that they hang on me like little monkeys begging for food, making it really hard to throw all the ingredients together.  This way I'm ready to go and avoid hungry-child meltdown. 

These pancakes freeze well (if you have any leftover!).  We just pop them in the toaster to reheat them. 


Just feast your eyes on those delicious pancakes.  Ignore my hideous countertop.


Cornmeal pancakes - Yield:  about 14 pancakes
- 1 cup boiling water
-3/4 cup cornmeal, medium grind if you can find it
-1 1/4 cups buttermilk
-2 eggs
-1 cup flour
-1 tbsp baking powder
-1 tsp salt
-1/4 tsp baking soda
-1/4 cup coconut oil, melted


1.  Melt coconut oil.  Meanwhile, pour boiling water over cornmeal in a medium sized bowl.  Stir until thick.
2.  Add buttermilk.  Beat in eggs.
3.  Sift flour, powder, salt and soda.  Add to cornmeal mixture.  Then stir in the oil.  Let batter rest before cooking. 
4.  Cook on a hot, greased griddle.  Batter will be thin.  These pancakes are almost crepe-like.  You could fill them with toppings, roll them up and eat them that way.

Thursday, May 3, 2012

The Scoop on the Coop... and the Poop

I never knew I would fall in love with chickens.  Look at them.  You've got to admit they are a little freaky - they're twitchy, spastic and quite frankly, they look like feathered dinosaurs.  So I was taken by surprise when I realized how hard I had fallen for these pea-brained birds.  Today, I would like to introduce you to our "ladies" and describe how we care for them.


"Lucille", a Rhode Island Red

We currently have 10 laying hens, 7 Rhode Island Reds and 3 ISA Browns.  Last spring, we were just moving into our new house and didn't have a coop set up yet, so our step-dad offered to raise them from chicks for us.  My husband threw himself into researching chicken coop design ideas and we quickly decided that a movable coop (also called a "chicken tractor") would be the best solution for us.  He scrambled to design and build the coop, and we finally brought the birds home when they were between 2-3 months old. 

Let me tell you a bit about the chicken tractor.  The basic idea of the chicken tractor is that the coop is movable with an open bottom so that the chickens have constant access to fresh grass.  In this way, the chickens are considered to be "pastured", but you avoid the risks of allowing them to be "free-ranging".  When we built the coop, we planned on keeping the birds in it at all times, since we're surrounded by homes with dogs, a woods full of predators and have a busy road nearby. This coop worked great and the chickens had plenty of room (more space per chicken than recommended), but I still felt bad keeping them penned up.  It was obvious they wanted to roam.  So one day, we opened the coop and let them loose.  And guess what?  They didn't run away.  We let them out in the evening, knowing that they wouldn't stray too far so close to bedtime.  Chickens will always head home to roost before it gets dark, so there is no need to worry about them running away.  Also, we discovered they really don't like to stray much farther than a few hundred feet from home.  We were delighted by these discoveries and decided to free-range our ladies all the time. 


The Chicken Tractor

Our chicken tractor is about 10'x4', more than enough space for 10 chickens to live comfortably.  Some days we do keep them penned up all day (like when we're on vacation and wintertime), so it was important to make it large enough, but not too heavy that we would not be able to roll the coop around the yard.  The roof of the coop is framed in with wood, but enclosed with the same mesh that was used on the sides of the coop.  An old billboard canvas/tarp is stapled over the mesh to keep out rain and wind.  Under the peak of the roof are the roosts.  This is where the birds sleep at night,  They simply fly up there when it's time for bed.  On the end of the coop are the nesting boxes with a access door from the outside for gathering eggs.  Originally, we had 6 nesting boxes, but had problems with the birds sleeping in the nesting boxes at night and pooping in them.   So we closed off 3 of them and now they seem reluctant to poop in their nests.  The coop has wheels on one end and wheelbarrow type handles on the other end.  We simply pick up the one end and roll the coop to fresh grass each day.

There are many benefit of using a chicken tractor or free ranging the hens, but I think the primary benefit is manure management.  Let me tell you, chickens poop.  All day.  All night.  All the time.  When they are confined to a stationary coop with a run, you better believe it's going to stink like chicken shit.  And within days they will completely annihilate any vegetation in their run.  Soon you are left with chickens running around on a poo-encrusted patch of bare ground that is hard as cement.  This is no fun for you (stinky!) and no fun for the chickens.  Chickens were designed to scratch and peck.  It what God created them to do - it's their job, their role in the animal kingdom.  By keeping chickens in a movable pen or a rotating pasture system, they are allowed to peck and scratch to their hearts content.  As a bonus, they will scratch their manure into the grass, spreading it nicely.  Our lawn has these rectangular patches of beautiful lush, green grass where ever the chicken tractor has been parked for a day.  Who needs to spread fertilizer?!?

Another benefit is lowered feed costs.  Chickens are omnivores, meaning they will eat almost anything (and yes, they can be cannibalistic).  When chickens are allowed to be on pasture or free-range, they will supplement their feed diet with lots of tasty bugs, worms and even grasses and seeds.  This variety of foods allows the animals to have a healthy, balanced diet at a lower cost for the owner. 

I really cannot think of any cons to using the chicken tractor system, except the fact that the tractor needs to be moved every day.  If you design it right, that task should take no longer than 30 seconds, at most.  However, I can think of a few cons to free-ranging chickens, like we do most of the time:

1. Remember how chickens poop all the time?  Well, they will poop everywhere - your deck, patio, driveway, in your garage if you keep it open...  This bothered us at first, but now we're over it.  It's just poop.  Kind of inconvenient, but not a big deal. 
2.  Chickens are curious little buggers.  Whenever my husband is working in the garage, they have to come check him out.  And then they poop on everything.  Having a campfire or party outside?  Yup, they're going to crash the party and jump on your guests laps and eat their food.  True story (sorry Maribeth).  We've learned to keep them in the chicken tractor if planning a party. 
3.  There is always the risk of predation or being hit by a car.  We have shockingly not lost a single bird to a predator (dog, fox, hawk, raccoon, etc.), but we did have one get hit by a car.  That was sad, but it's a risk we are willing to take for the sake of healthier chickens and better tasting eggs.  We think the fact that we have our 2 dogs roaming about the yard most of the day keeps other predators away.

We will continue to free-range our chickens as much as possible.  I know it sounds quaint, but it makes it feel so homey to have chickens roaming around.  And they make a great conversation starter.  Heck, a few weeks back we had some uninvited Jehovah's Witnesses stop by. I always dread talking to them.  But I shouldn't have worried.  They were so enamoured with my chickens that they just handed me the pamphlet and peppered me with chicken questions instead.  Whew.  Saved by the chickens.

So when you stop on by, feel free to say hello to the ladies... but watch your step.